Navigating the night sky can be confusing and hard especially if you are a beginner. Luckily, there are imaginary lines and grids that can help you navigate the night sky with more ease. In this article, we’ll have a quick look at each one and discuss what each one is!
Ecliptic
First in our list is the Ecliptic. This imaginary line is a line that passes through the boundaries of the 13 zodiac constellations (Why is it 13, and not 12? Find out in our next article coming out soon)
![]()
Another interesting thing about this line is the objects in our solar system, the Moon, the Sun, and the planets, can be found in the ecliptic. This is important to take note when you plan to observe these objects.
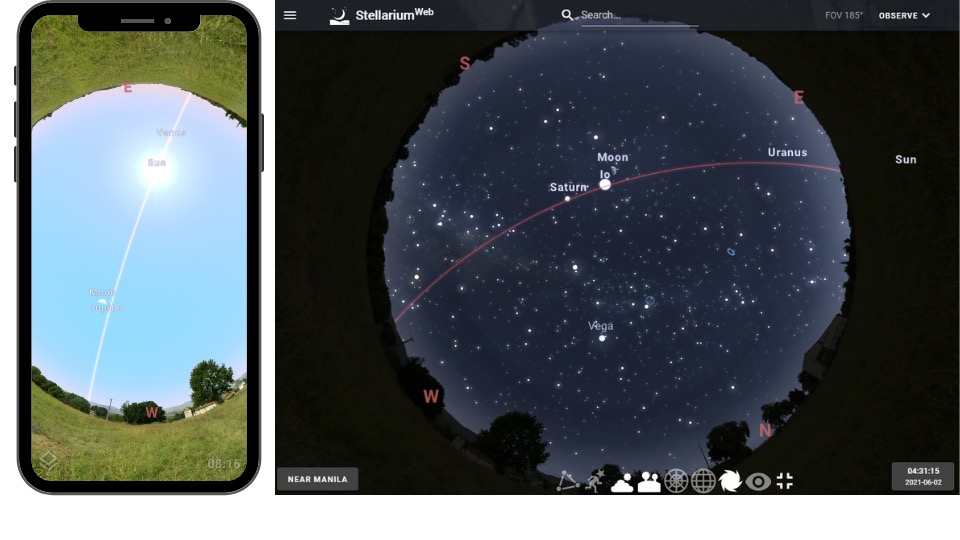
Meridian
Another interesting line is the Meridian. The meridian is an imaginary line that connects the North and the South cardinal points. This imaginarily divides the sky into 2 parts.
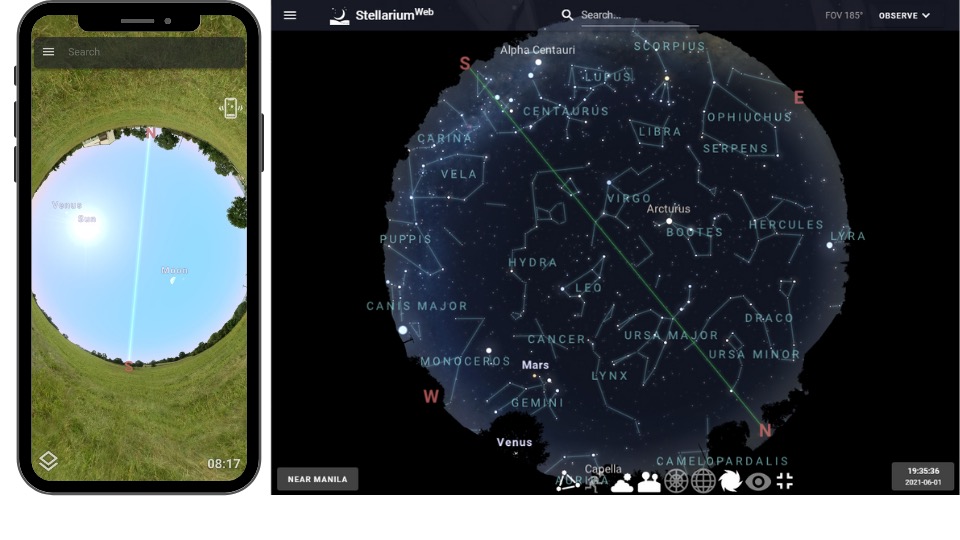
The meridian is significant in telling the time of the day. As a matter of fact, the ‘M’ in the AM and PM that we attached to a time stands for Meridian. Our Sun passes through this line everyday, the time before it passes the Meridian is called Ante Meridian which means ‘before the meridian’ and the time after it passes is called Post Meridian which means ‘after the meridian’
Celestial Equator
This imaginary line is directly above our equator. This line varies depending on how far or near you are to the equator and to the poles. If you are in the equator, this line will be directly above you, or in what we call the zenith.
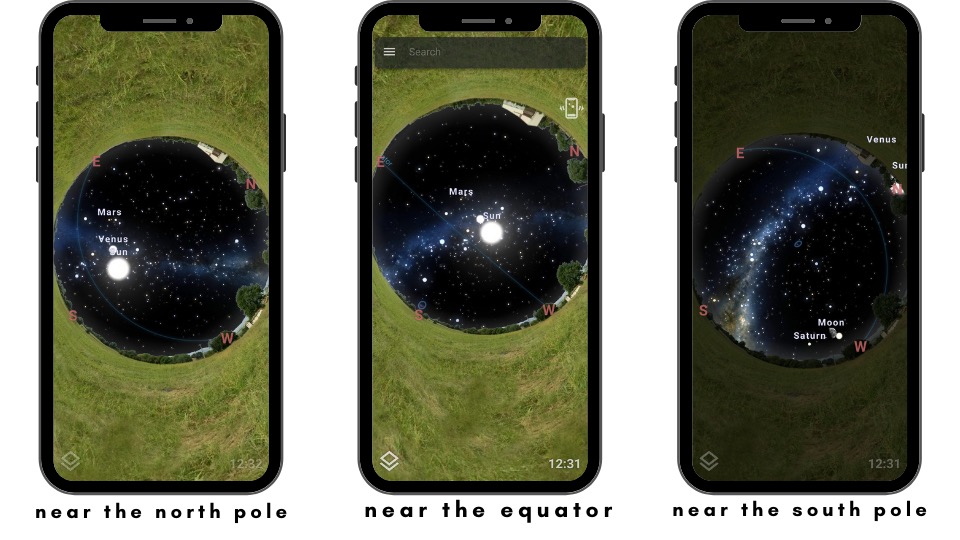
You can also see in the image above that if you are near the south pole, the celestial equator curves towards the north cardinal point, and vice versa.
Azimuthal Grid
Aside from these imaginary lines, there are also grids that can help us navigate the skies. The first one on our list is the Azimuthal Grid.
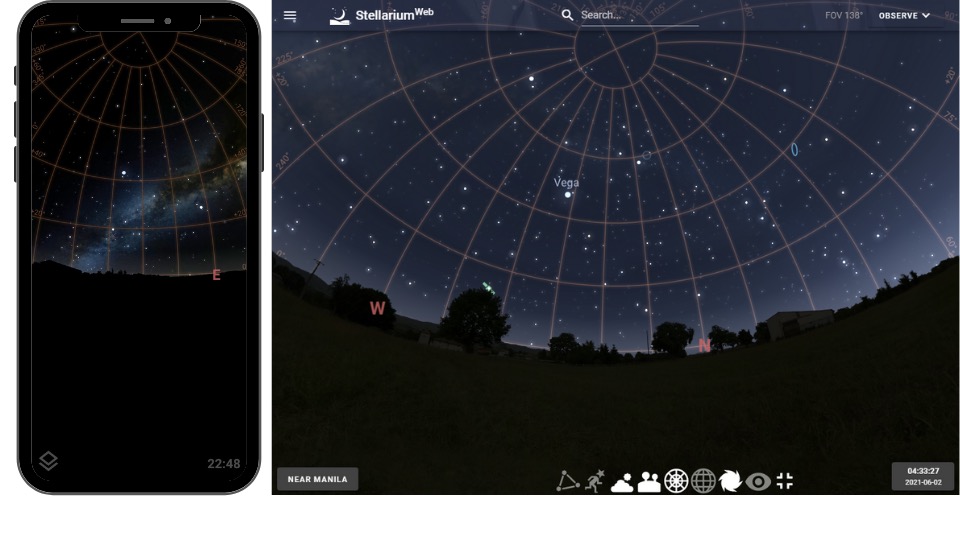
This is also known as the Altitude-Azimuth Grid or simply Alt-Az. This grid is based on the object’s altitude and azimuth, relative to the observer. In this grid, the North coordinate point is marked as 0° and the South as 180°. This is marked as the object’s azimuth. Then, for the altitude, the observer’s zenith (the point directly above the observer) is marked as 90° and the horizon is marked as 0°.
Equatorial Grid
Next, in this list is the Equatorial Grid. Some people prefer to use this when navigating the night sky during observations. This is because this grid follows the rising and setting of the celestial objects which makes observation easier.
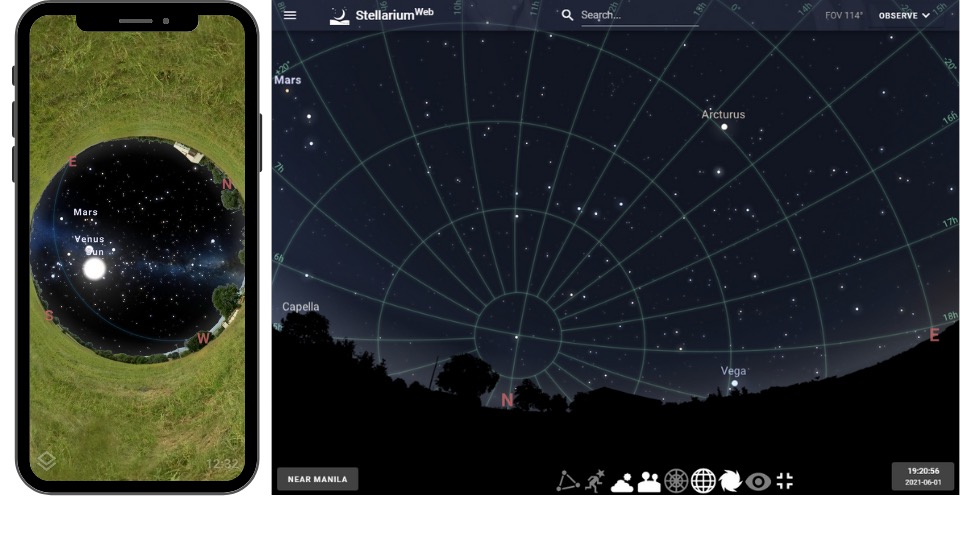
As you can see in this photo, this grid is centered on Polaris, which is also known as the North star. Like the celestial equator, this grid is also dependent whether you are near the equator or to the poles.
Equatorial J2000 Grid
Last on this list is the Equatorial J2000 Grid. At first glance, this looks similar to the Equatorial Grid but, if you look closer, you will see a difference. This is because the equatorial grid is dependent on the Earth’s orientation and position, but this changes over a period of time.
The J2000 grid is made to compensate for such change in position. You can see this difference also when you see details or information about an object.
Available on Google Play and the iOS App Store
<p align= "right">
App Store® Google Play and the Google Play logo are trademarks of Google LLC.

